

In this article
- First: What is a blowout?
- Salon-grade blowout VS At-home blowout
- Techniques for salon-grade blowout
- What you need to blow out hair at home?
- Step-by-step guides to blow out hair with a round brush & ionic hair dryer
- Volume! Expert tips to blowout hair for volume
- The verdict: How to blow out natural hair?
- FAQs
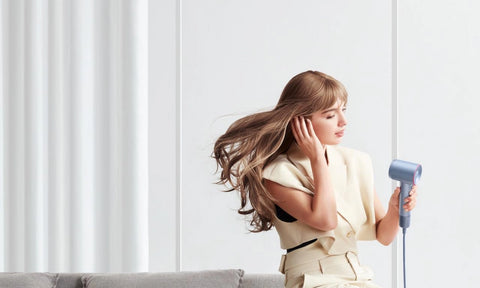
A blowout is one of the most popular hairstyles among women, as it’s sophisticated and relatively easy to achieve. It works for women with medium-length hair, with most blowouts sitting around the shoulder line.
While you might typically visit your hairdresser for a wash and blowout, we’re here to tell you that you can achieve this super smart look without leaving your home.
So, with that in mind, join us as we introduce you to the tools you need to attempt a blowout and the ten simple steps that you should follow to achieve a salon-grade style at home.
First: What is a blowout?

When we write of a blowout, we’re referring to that smooth and sleek look for medium-long hair that you can achieve with careful use of a hair dryer. Most people go to the salon for the slaon-style blowout, and your stylist’s expertise can undoubtedly help with this signature look.
However, as we explain below, you should be able to achieve a salon-grade blowout from home, provided that you use the right tools and follow some basic steps.
Salon-grade blowout VS At-home blowout
A blowout can completely change how your hair looks and feels. A salon-grade blowout delivers well-defined results using professional techniques, premium tools, and expert timing, while an at-home blowout focuses on everyday styling. With today’s advanced hair tools, the gap between salon and home styling is shrinking, but the experience and outcome still differ in key ways.
| Salon-Grade Blowout | At-Home Blowout | |
| Skill level | Performed by trained professionals | Done by yourself |
| Tools | High-end, commercial-grade tools | Consumer hair dryers & brushes |
| Time | 30–60 minutes | 10–30 minutes |
| Cost | Higher, recurring expense | One-time tool investment |
| Overall | Ultra-polished, long-lasting | Natural, customizable |
| Convenience | Appointment required | Anytime, anywhere |
| Scenarios | Special events, long wear | Daily styling, quick touch-ups |
Techniques for salon-grade blowout
Professionals rely on precision sectioning, airflow direction, heat management, and timing to create smooth, long-lasting results. With the right approach (and a powerful dryer), you can recreate that salon dry at home.
1. Precision sectioning
Salon stylists never dry hair all at once. They divide hair into clean, manageable sections to control tension and airflow. This ensures each strand is evenly dried and styled, reducing frizz and uneven volume.
Example:
Split hair into four sections: two in front, two in back. Clip everything except the section you’re working on. Focus the airflow downward from roots to ends before moving on. This technique alone can improve smoothness and shape compared to random drying.
2. Directional airflow control
Professionals always point airflow in the direction the hair should lay. This smooths the cuticle and enhances shine while preventing puffiness.
Example:
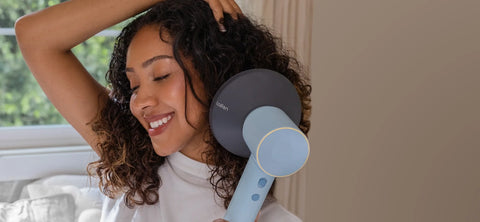
Use a concentrator nozzle and angle the dryer downward along the hair shaft while brushing. A high-speed dryer like the Laifen Swift Special helps maintain consistent airflow, so you will find it easy to control flyaways and achieve that salon-like result without excessive heat.
3. Tension with the right brush
A salon blowout depends heavily on brush tension. Stylists use round or paddle brushes to stretch the hair while drying, shaping volume and bend at the same time.
Example:
Wrap hair slightly around a round brush at the roots, pull upward for lift, and roll through the mid-lengths. Keep steady tension while drying. This creates bounce and structure that lasts far longer than air-drying or rough blow-drying.
4. Heat & speed control
Salon results come from adjusting heat and airflow based on hair type, not blasting maximum heat the entire time. Controlled heat protects hair while improving longevity.
Example:
Use higher airflow with moderate heat for initial drying, then lower heat as hair becomes drier. The Special offers precise temperature control and help prevent heat damage while locking in smoothness.
5. Setting Technique
Stylists always “set” the hair before letting it fall. Then, your style holds its shape and shine.
Example:
After drying a section, wrap it around the brush and let it cool for a few seconds before releasing. Repeat section by section. This cooling phase helps hair remember its shape, which gives you a longer-lasting blowout instead of a temporary style.
What you need to blow out hair at home?
You need the right tools to achieve a salon-worthy blowout at home. Here’s a checklist of items before we get started:
✅ An ionic hair dryer with adjustable heat settings.
✅ A microfiber towel.
✅ A heat protectant spray (if you have thin hair).
✅ A round brush.
✅ A wide-tooth comb.
✅ Oil or shine serum.
✅ Styling cream or hair gel (optional).
If you have these items, you can proceed to our step-by-step guide below to get started with the ultimate at-home blowout.
Step-by-step guides to blow out hair with a round brush & ionic hair dryer
There are ten simple steps for you to follow when blowing out your hair at home, starting with washing your hair with a hydrating shampoo and conditioner combo:
Step 1. Wash your hair
Firstly, you must wash your hair. Using a sulfate-free shampoo, then massage the product into your hair and leave it for 2-3 minutes. Then, rinse it out with warm water before applying a conditioner. Again, leave it for a few minutes before washing it out.
Step 2. Towel dry your hair
Using a good towel, pat your hair dry after stepping out of the shower. A microfiber towel is a much better option than a standard towel, as it produces much less friction. Also, be careful not to rub your hair dry, as you can cause damage and breakage.
Step 3. Detangle your hair

After drying your hair with a towel, it may be a little tangled. Therefore, before starting your blowout, you should use a wide-tooth comb or a wet brush to detangle it. If you have curly or coily hair, you might need to apply a detangling spray before using the comb, as you don’t want your hair to break as you’re combing it. If your hair is 4c, directly learn how to detangle 4c hair in correct ways.
Step 4. Apply a heat protectant (optional)

If you have fragile hair and want to protect it from heat damage, you can apply a heat protectant spray at this stage. However, as we explain below, it’s not an essential step, as we instruct you to adjust the heat setting on your hair dryer.
Step 5. Separate your hair
Using hair clips, separate your hair into two distinct sections. You will need to divide your hair into two parts and ensure each “piece” of your hair is no wider than the round brush you plan to use for the blowout. At this stage, brush your hair a few times to remove any tangles and ensure it’s straight.
Step 6. Adjust your hair dryer

Turn on your Laifen Swift Special hair dryer and set it to a low or medium temperature. You don’t need to dry your hair in the hottest heat, as this will likely cause it to dry out. Using the low or medium temperature setting is a great way to achieve a salon-grade style without leading to dry or brittle hair.
Step 7. Begin the blowout
You’re now ready to start blow-drying your hair. Fix your brush into the roots of one of your sections of hair and brush down to the ends. As you brush, angle the blow dryer so it evenly distributes air to the section you’re working on.
Be careful not to hold the dryer too close to your scalp, as this can cause damage. As you dry, pull your hair up and down to add volume to the blowout.
Step 8. Repeat for both sections
You should blow dry your hair evenly and repeat the process for both sections. We recommend keeping your hair coiled on the brush until it is cool, as this is the secret to shiny hair after a blowout.
Step 9. Style your hair

There are numerous ways to style your hair after drying it. But for a classic look, consider curling the ends of your hair. This is an easy way to add texture to a blowout. After curling your ends, set your hair in place by blow-drying it with cool air. Finally, apply some oil or shine serum to your hair for a glossy, stylish look.
Step 9. Add a styling cream
The final step in our blowout tutorial is to use a styling cream or hair gel. This is the best way to deal with unruly strands of hair. You can dab a small amount of gel or styling cream onto wantaway strands, which will keep them in place and prevent your blowout from looking disheveled.
Volume! Expert tips to blowout hair for volume
The simple steps above make it easy for you to achieve a salon-level blowout at home. But to take things one step further, we asked our styling experts for their top tips for blowouts, and this is what they recommend:
1. Use a nourishing shampoo to wash your hair
The key to achieving a shiny, blowout is hydration. If your hair is dehydrated, you’re more susceptible to frizz. Therefore, when washing your hair pre-blowout, use a nourishing and hydrating shampoo and conditioner combination for the best results.
2. A thickening mousse can help to boost volume

A thickening styling mousse is a wonderful way to increase your hair’s volume. You can apply a mousse directly after drying your hair with a towel and just before you start blow drying it. If you hairstyles are classic like 80s blowout hair, a mousse will be helpful.
3. Don’t use strong-hold hairspray
Though you can apply hairspray after blowing out your hair, avoid sprays branded as “stronghold.” Using a strong spray means you will need to wash your hair soon after a blowout, so you can select a light or medium-hold spray if you want to keep your hair in check throughout the day.
The verdict: How to blow out natural hair?
The key to a salon-grade blowout at home is using the right tools and products. You can then follow our simple ten steps and expert tips to achieve a blowout that you can be proud of.
To avoid frizz, switch to the Swift Special and blow dry your hair on the low or medium heat setting. You also need to use a high-quality round brush for a consistent blow-out that helps bring out your hair’s best features.
For more details before you attempt a blowout at home, read our FAQs below.
FAQs
Q1: How to blow out curly hair?
You can follow the steps listed above to blow out curly or straight hair. One thing we recommend that’s different is the use of a flat iron if you have natural curls or waves. Using a flat iron will help to straighten out your curls and will achieve results more quickly.
Q2: How to blow out short hair?
One of the biggest challenges you will face when blowing out short hair is depth at the crown. We recommend using a round brush that will lift the roots at the crown before directing the air from your dryer to the roots and ends. You should twist your brush as you go to create waves for more texture.
Q3: How to blow out frizzy hair?
If your hair is frizzy before attempting a blowout, you will need to nourish and hydrate it. Failing to do so will lead to even more frizz. Therefore, you can wash your hair with a nourishing shampoo and conditioner and using an ionic hair dryer like the Laifen Swift Special to keep your frizz under control.